Introduction
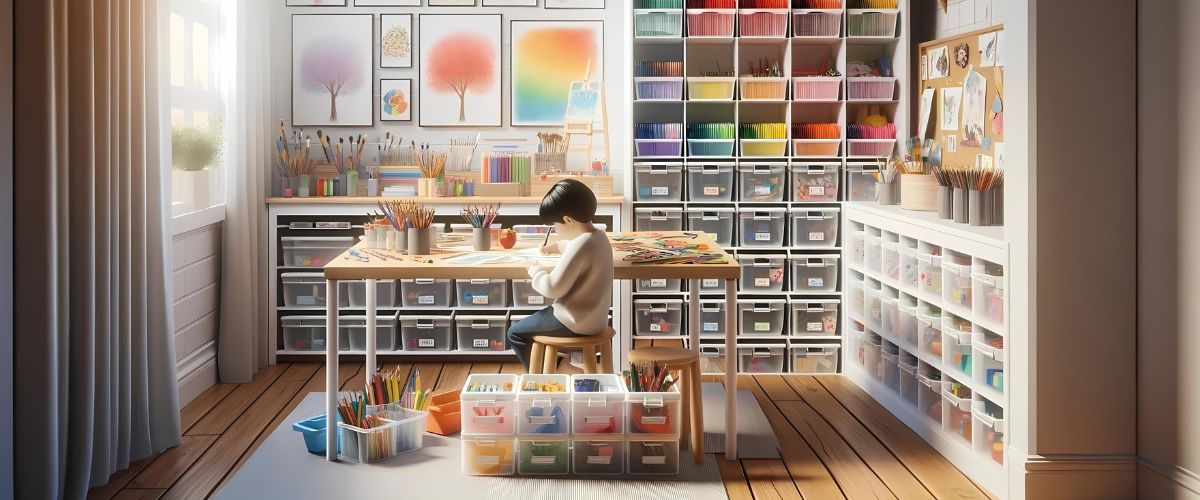
A well-organized art space can make a significant difference in fostering creativity and productivity in children. Art supplies, when properly organized and stored, are easier to access, reducing the time spent searching for materials and increasing the time available for creative activities. Moreover, teaching children to maintain an organized art space can instill valuable habits of tidiness and responsibility.
The benefits of a well-organized art area extend beyond mere convenience. An orderly space can inspire creativity by providing a clear and inviting environment for artistic exploration. It also ensures that supplies are well-maintained and last longer, reducing waste and saving money. This article will guide you through various strategies and tips for organizing and storing art supplies effectively, helping to create an inspiring and functional art space for your child. From choosing the right storage solutions to involving children in the organization process, we’ll cover everything you need to know to keep your art supplies in perfect order.
Choosing the Right Storage Solutions
Assessing Your Needs
Before selecting storage solutions for your child’s art supplies, it’s essential to assess your specific needs. Start by taking an inventory of the types and quantities of art supplies you have. Are there more crayons and markers, or do you have a variety of paints and brushes as well? Understanding what you need to store will help you choose the most appropriate solutions.
Consider the age and independence of the child. Younger children may benefit from simpler, easy-to-access storage options, while older children might appreciate more sophisticated organizational systems that allow them to sort and manage their supplies independently.
Types of Storage Solutions
Bins and Boxes
Bins and boxes are versatile storage solutions that can accommodate a wide range of art supplies. They are stackable, which makes them ideal for maximizing space, especially in smaller areas.
- Clear Plastic Bins: These allow you to see the contents at a glance, making it easy to find what you need quickly.
- Decorative Boxes: These can add a touch of style to your art space while keeping supplies organized.
Drawers and Cabinets
For larger collections or more permanent setups, drawers and cabinets offer a robust storage solution. They can hold a variety of supplies and keep everything neatly tucked away.
- Multi-Drawer Units: These are perfect for sorting different types of supplies into separate drawers.
- Cabinets with Shelves: Adjustable shelves can accommodate supplies of various sizes and shapes.
Portable Caddies
Portable caddies are ideal for flexible and mobile storage. They allow your child to move their art supplies from room to room or even take them outside for some fresh-air creativity.
- Carry-All Caddies: With compartments for different supplies, these caddies are easy to transport and keep organized.
- Rolling Carts: These offer mobility with the added benefit of more storage space.
Hanging Organizers
Hanging organizers are a great space-saving solution, particularly for small areas. They keep supplies off the floor and desks, freeing up workspace.
- Over-the-Door Organizers: Perfect for storing smaller items like crayons, markers, and scissors.
- Wall-Mounted Racks: These can hold items like rolls of paper, paints, and brushes, keeping them within easy reach.
DIY Storage Solutions
For those who enjoy a bit of creativity in their organization, DIY storage solutions can be both fun and cost-effective.
- Upcycled Containers: Use jars, cans, and boxes to create personalized storage solutions. Decorate them together for a fun project.
- Customized Shelving: Build simple shelves or cubbies to fit your specific needs. Pegboards with hooks and baskets can also offer versatile storage options.
Choosing the right storage solutions not only keeps art supplies organized but also makes the art-making process more enjoyable and efficient. By assessing your needs and exploring various storage options, you can create a tidy, inspiring space that encourages creativity and independence in your child.
Organizing Art Supplies by Category
Categorizing Supplies
A key step in organizing art supplies is categorizing them into groups. This makes it easier to find and use specific items and ensures that everything has its place.
Grouping Similar Items
Start by grouping similar items together. This can include:
- Drawing Tools: Crayons, markers, colored pencils, and pens.
- Painting Supplies: Paints (watercolors, acrylics), paintbrushes, palettes, and water cups.
- Paper Products: Sketchbooks, drawing paper, construction paper, and canvas.
- Craft Supplies: Scissors, glue, stickers, beads, and ribbons.
- Specialty Items: Glitter, stencils, stamps, and ink pads.
Using storage containers that are appropriately sized for each category helps keep everything neat and accessible. Clear containers or labeled bins can make it easy for children to find and return items.
Creating Dedicated Spaces
Designing specific areas for different types of supplies can enhance organization and make it easier for children to access what they need.
Drawing and Coloring Area
Set up a dedicated space for drawing and coloring. Use storage solutions like:
- Tabletop Organizers: Keep frequently used items like crayons, markers, and colored pencils within easy reach.
- Drawer Units: Store less frequently used items in drawers that can be easily accessed.
Painting Station
A painting station can help contain messes and make clean-up easier.
- Paint Caddies: Store paints, brushes, and palettes in a caddy that can be easily moved.
- Waterproof Mat: Protect the surface with a waterproof mat or tablecloth.
Craft Corner
Create a craft corner for more elaborate projects.
- Storage Bins: Use bins or boxes to separate different types of craft supplies.
- Shelving Units: Install shelves to store larger items and keep everything organized.
Digital Art Area
If your child also enjoys digital art, set up a dedicated space for it.
- Desk Organizer: Keep tablets, styluses, and chargers organized on a desk.
- File Management: Use digital folders and apps to store and manage digital art files.
Using Labels for Easy Identification
Labels are incredibly useful in maintaining an organized art space. They help children know where to find and return items, fostering independence and responsibility.
Types of Labels
- Printed Labels: Use a label maker or print labels on a computer for a neat and professional look.
- Handwritten Labels: Personalize storage containers with handwritten labels, which can also be a fun activity for children.
- Picture Labels: For younger children, use pictures instead of words to help them identify where items belong.
Label Placement
- Containers and Bins: Place labels on the front or top of containers so they are easily visible.
- Drawers and Shelves: Attach labels to the front of drawers and shelves to indicate what is stored inside.
By categorizing supplies and creating dedicated spaces, you can create an organized and efficient art area. This not only makes it easier to find and use supplies but also helps children learn to manage their materials responsibly, fostering a sense of order and independence in their creative activities.
Tips for Maintaining an Organized Art Space
Regular Cleaning and Sorting
Maintaining an organized art space requires regular cleaning and sorting. This helps keep supplies in good condition and ensures that the space remains inviting and functional.
Establishing a Routine
Set a regular schedule for cleaning and organizing the art space. This could be a weekly or bi-weekly activity, depending on how frequently the space is used.
- Daily Tidying: Encourage your child to spend a few minutes at the end of each art session putting supplies back in their designated places.
- Weekly Cleanup: Dedicate a specific time each week for a more thorough cleaning. This can include wiping down surfaces, checking supplies for damage, and reorganizing if needed.
Rotating Supplies
To keep the art space fresh and exciting, consider rotating the supplies available to your child.
- Seasonal Rotation: Change out supplies based on seasons or holidays. For example, bring out themed stickers and colors for different holidays.
- Skill Level Rotation: As your child grows and their skills develop, rotate in more advanced supplies to keep them challenged and engaged.
Involving Children in Organization
Involving children in the organization process not only teaches them valuable skills but also helps them take ownership of their art space.
Teaching Responsibility
Show your child how to care for their art supplies and the importance of putting things back in their place.
- Demonstrate Organization: Model how to organize supplies and involve your child in the process.
- Set Clear Expectations: Establish clear rules about tidying up after using the art space.
Making Organization Fun
Turn organization into a fun and engaging activity that your child looks forward to.
- Decorate Storage Solutions: Let your child decorate storage bins and containers. This makes the process more enjoyable and gives them a sense of ownership.
- Create a Game: Turn cleanup into a game by timing how quickly your child can put supplies away or by offering small rewards for keeping the space tidy.
Practical Tips for Ongoing Maintenance
Here are some practical tips to help maintain an organized art space:
- Use Clear Containers: Clear containers make it easy to see what’s inside, reducing the time spent searching for items.
- Label Everything: Consistent labeling helps everyone know where supplies belong.
- Keep Supplies Within Reach: Store frequently used items at a height that your child can easily reach. Less frequently used items can be stored higher up or in less accessible areas.
- Check Supplies Regularly: Periodically check supplies to see if any need to be replaced or replenished. This helps avoid frustration from running out of essential items.
By establishing routines, involving children in the organization process, and making the activity fun, you can maintain an organized and functional art space. This not only keeps the area tidy but also encourages children to take pride in their creative environment, fostering a positive and productive artistic experience.
Creative DIY Storage Ideas
Upcycled Containers
Upcycling everyday household items into storage containers is a cost-effective and environmentally friendly way to organize art supplies. It also provides an opportunity for a fun, creative project that you and your child can do together.
Using Household Items
Look around your home for items that can be repurposed into storage containers. Some ideas include:
- Jars and Cans: Clean glass jars and tin cans can be used to store pencils, brushes, and markers. Decorate them with paint, stickers, or fabric to add a personal touch.
- Shoe Boxes: Cover shoe boxes with wrapping paper or fabric to create custom storage boxes for paper, coloring books, or larger supplies.
- Egg Cartons: Use egg cartons to store small items like beads, buttons, or pom-poms.
Decorating Containers
Transforming everyday items into beautiful storage solutions can be a fun and rewarding activity.
- Paint and Stickers: Let your child paint the containers in their favorite colors and add stickers or decals for extra decoration.
- Fabric and Ribbon: Wrap containers in fabric and secure with ribbon for a more polished look. This can be a great way to match the storage solutions with your child’s room decor.
- Personalized Labels: Create personalized labels for each container. You can print labels on a computer or handwrite them for a more personal touch.
Customizable Storage Units
Building your own storage units allows you to create solutions that perfectly fit your space and needs. This can be an exciting project that involves the whole family.
Building Simple Shelves or Cubbies
Custom shelves or cubbies can provide a perfect fit for your specific storage needs.
- Wooden Crates: Stack and secure wooden crates to create customizable shelving units. Paint or stain them to match your decor.
- PVC Pipes: Cut PVC pipes into sections and glue them together to create unique storage cubbies for pens, pencils, and brushes.
Pegboards and Hooks
Pegboards are incredibly versatile and can be used to create an organized and accessible storage solution.
- Installing Pegboards: Mount a pegboard on the wall near your child’s art area. Use hooks and baskets to hold various supplies.
- Customizing Pegboards: Paint the pegboard to match the room’s decor. Add custom hooks and shelves to fit different types of supplies.
Creating a Personalized Art Station
A dedicated art station can help keep supplies organized and make it easy for your child to start creating at any time.
Designing the Art Station
Consider the following when setting up an art station:
- Size and Location: Choose a location that has enough space for your child to work comfortably. A corner of a room or a section of the kitchen table can work well.
- Work Surface: Provide a sturdy table or desk where your child can spread out their supplies and work on projects.
- Accessible Storage: Make sure that all supplies are within easy reach. Use shelves, bins, and containers to keep everything organized.
Personalizing the Space
Let your child have a say in how their art station is set up and decorated.
- Wall Art: Hang your child’s artwork on the walls around their art station to create an inspiring and personal space.
- Custom Chair: Add a comfortable chair that is the right height for your child. Decorate it with cushions or fabric that match the theme of the art station.
- Display Shelves: Install shelves to display completed projects. This not only keeps the workspace tidy but also gives your child a sense of pride in their creations.
By incorporating creative DIY storage ideas, you can create a personalized and functional art space that encourages your child to be organized and inspires their creativity. Upcycling and customizing storage solutions not only make the space more appealing but also involve your child in the process, making it a rewarding and engaging activity.
Portable and On-the-Go Solutions
Having portable and on-the-go storage solutions ensures that your child’s creativity isn’t limited to just one location. Whether traveling, visiting relatives, or simply moving from room to room, these portable options can make art supplies easily accessible anywhere.
Travel Art Kits
Travel art kits are compact and designed to hold essential art supplies, making them perfect for use on the go.
Creating a Travel Art Kit
To create a travel art kit, consider the following:
- Choose a Sturdy Container: Use a small, durable container or bag that can withstand travel. A zippered pouch or a small plastic bin with a secure lid works well.
- Essential Items to Include:
- Drawing Tools: Pack a few crayons, markers, or colored pencils.
- Paper Supplies: Include a small sketchpad or a few sheets of paper.
- Accessories: Add a pair of safety scissors, a glue stick, and a small eraser.
- Organize Efficiently: Use small ziplock bags or elastic bands to group similar items together, preventing them from getting mixed up.
Recommended Portable Art Kits
Several brands offer pre-made travel art kits that are convenient and well-organized:
- Melissa & Doug: Offers compact, themed art kits perfect for travel.
- Crayola: Provides a range of travel-friendly kits with crayons, markers, and paper.
- DIY Options: Create your own customized kit tailored to your child’s preferences.
Portable Storage Caddies
Portable storage caddies allow for flexibility and easy access to art supplies, whether at home or on the go.
Benefits of Portable Storage Caddies
- Mobility: Easily move art supplies from room to room or even outdoors.
- Organization: Keep supplies organized and within reach, reducing setup time.
- Accessibility: Allows children to access and put away supplies independently.
Recommended Portable Storage Products
- Carry-All Caddies: These caddies come with compartments for different types of supplies and often have handles for easy transport.
- Rolling Carts: Equipped with multiple tiers, rolling carts offer ample storage and can be easily moved around.
- Stackable Bins: Small, stackable bins with lids can be labeled and carried as needed.
Tips for Using Portable Solutions
Keeping Supplies Organized
To ensure portable storage solutions remain organized and functional:
- Label Containers: Clearly label each section or container to help your child know where everything belongs.
- Regular Maintenance: Periodically check and replenish supplies, ensuring that the travel kit or caddy is always ready for use.
- Teach Responsibility: Encourage your child to take responsibility for their portable art supplies, teaching them to clean up and organize after each use.
On-the-Go Art Activities
Plan some simple, portable art activities that can be done anywhere:
- Drawing Prompts: Prepare a set of drawing prompts or coloring pages that can be easily packed.
- Sticker Books: Include a small sticker book for a fun, mess-free activity.
- Travel-Friendly Craft Kits: Look for compact craft kits that include all necessary materials and instructions.
By incorporating portable and on-the-go solutions into your art supply organization, you can ensure that your child’s creative activities are not confined to a single space. These solutions provide flexibility and convenience, allowing your child to enjoy their artistic pursuits wherever they are, whether at home, traveling, or visiting friends and family.
Organizing Digital Art Supplies
In today’s digital age, many children enjoy creating art using digital tools. Organizing digital art supplies can be just as important as organizing physical ones, ensuring that digital artwork and tools are easy to find and manage.
Managing Digital Files
Creating a system for managing digital files helps keep your child’s digital artwork organized and accessible.
Creating a Digital Filing System
Organize digital files using folders and subfolders. Here are some tips:
- Main Folders: Create main folders for broad categories such as “Drawings,” “Paintings,” “Animations,” etc.
- Subfolders: Within each main folder, create subfolders for specific projects or themes, like “Animals,” “Landscapes,” “School Projects,” etc.
- Date Folders: Another approach is to organize files by date, with folders for each month or year.
Naming Conventions
Use clear and consistent naming conventions for digital files to make them easier to find:
- Descriptive Names: Include the subject and date in the file name (e.g., “Cat_Drawing_Jan2024.png”).
- Version Numbers: For ongoing projects, use version numbers to keep track of different stages (e.g., “Landscape_V1.png,” “Landscape_V2.png”).
Using Apps and Software
Several apps and software programs can help organize digital art supplies and creations.
Art Organization Apps
- Google Drive: Use Google Drive to store and organize digital artwork. It offers cloud storage, making files accessible from any device.
- Dropbox: Another cloud storage option that allows easy sharing and organization of files.
- Evernote: Ideal for organizing notes, sketches, and images, and it allows for easy tagging and searching.
Digital Art Creation Apps
- SketchBook: Offers a range of drawing tools and the ability to organize drawings in galleries and folders.
- ArtRage: Provides realistic painting tools and a simple file organization system within the app.
Backing Up Digital Work
Regularly backing up digital artwork is crucial to prevent loss of important files.
Backup Solutions
- External Hard Drives: Store copies of digital artwork on external hard drives for easy access and added security.
- Cloud Storage Services: Use cloud services like Google Drive, Dropbox, or iCloud to automatically back up files.
- Automatic Backup Software: Programs like Time Machine (for Mac) or Windows Backup can automate the backup process.
Best Practices for Backing Up
- Regular Backups: Schedule regular backups, such as weekly or monthly, to ensure all new artwork is saved.
- Multiple Locations: Store backups in multiple locations (e.g., cloud storage and an external hard drive) for added security.
- Version Control: Keep multiple versions of important files to prevent accidental loss of changes or edits.
Organizing Digital Art Tools
Just like physical art supplies, digital tools need organization to be easily accessible.
Digital Tool Management
- Brush and Tool Presets: Organize brush and tool presets within digital art apps. Label and categorize them for easy access.
- Resource Libraries: Maintain libraries of digital resources such as textures, patterns, and reference images. Use folders and tags to keep them organized.
- Software Updates: Keep digital art software up-to-date to ensure access to the latest features and tools.
By effectively organizing digital art supplies and creations, you can ensure that your child’s digital art experience is enjoyable and productive. A well-organized digital space allows for easy access to tools and artwork, fostering creativity and making it simple to manage and share digital projects.
Conclusion
An organized art space can make a world of difference in fostering your child’s creativity and productivity. By implementing effective storage solutions and maintaining an orderly environment, you can create a space that is both functional and inspiring for young artists.
Recap of the Benefits
Organizing and storing art supplies properly offers numerous benefits:
- Ease of Access: With a well-organized space, children can easily find and access the materials they need, which can enhance their focus and enjoyment.
- Enhanced Creativity: An inviting, clutter-free art space encourages children to explore their creativity without distractions.
- Responsibility and Independence: Teaching children to organize their supplies helps them develop valuable skills and take ownership of their creative space.
- Longer-Lasting Supplies: Proper storage can extend the lifespan of art materials, reducing waste and saving money over time.
Implementing Strategies
To create and maintain an organized art space:
- Choose the Right Storage Solutions: Assess your needs and select appropriate storage options, from bins and boxes to portable caddies and DIY solutions.
- Categorize and Label Supplies: Group similar items together, create dedicated spaces, and use labels for easy identification.
- Maintain Regularly: Establish routines for cleaning and sorting, involve children in the organization process, and rotate supplies to keep the space fresh and exciting.
- Explore Creative DIY Ideas: Upcycle household items, customize storage units, and personalize the art station to make it unique and engaging.
- Consider Portable Options: Use travel art kits and portable caddies to ensure that art supplies are accessible anywhere.
- Organize Digital Art Supplies: Create a digital filing system, use organization apps, back up digital work, and manage digital tools effectively.
Encouragement to Implement These Strategies
By implementing these strategies, you can create an organized, inspiring, and productive art space for your child. An orderly environment not only makes it easier for children to find and use their supplies but also fosters a positive and enriching experience that can nurture their artistic talents and creativity.
Encourage your child to take an active role in organizing their art supplies, making the process fun and engaging. Whether through decorating storage containers, participating in regular cleanup routines, or managing their digital files, children can learn valuable skills that extend beyond the art room.
